Gravity Quest - Visuals and sound
Other posts in this series:
In the previous article, I discussed the collision detection used in Gravity Quest (see at Apple's App store), thus finalizing the part about the game's gameplay. In this article, I present how Gravity Quest's visuals and sound came to live.
For Gravity Quest, my goals with regard to visuals and sound were quite low - I am by no means an artist and I, honestly, dreaded the effort it takes to create truly outstanding visuals and sound. My goal was thus foremost to create a coherent experience - to give Gravity Quest a distinct look and feel.
Painting sprites
I decided to pursue a pixel art style for multiple reasons. First, pixel art induces constraints, which I hoped would help in creating a cohesive style. Second, pixel art is as of this writing experiencing a lot of attention, eventually even being considered to be the future of gaming. Be it nostalgia or the timelessness of pixel art, I personally appreciate this trend. Third, I reasoned that a limited amount of pixels would reduce the required effort to create visuals (this was very naive). A great article describes what's the deal with pixel art.
To create the game's sprites, I mostly used the Pixen app for Mac OS. It is available on the Apple App store or can be compiled from the xCode project freely available from GitHub. Pixen is designed to create pixel art, offering a well-selected set of drawing tools, layers to work with, and supports the creation of animations.
Creating the artwork was marked by continuous iterations. For example, image 1 shows some versions of the astronaut. Their differences were sometimes major, as the complete re-design from version 1 to 2 or adding animations in version 5, and sometimes minor, like changing the hands' color from black (invisible in front of the black space) to dark gray in version 3.
 Image 1: some versions of the astronaut sprite
To get inspired for the shapes and colors to use in the game's sprites, I used Google's image search to get photos of these objects, like asteroids, explosions, or space ships.
Animations
Much effort also went into animations. Despite being certainly limited, there are some animations present in the game. Novae feature some flickering as shown in image 2, aiming to make them appear ever-active. Anti-gravitational force fields constantly emit expanding gravitational waves, as shown in image 3, which required stoic endurance with Pixen's circle tool. The last two frames seem blurred out because the expanding ray's transparency is increased to simulate them fading out. The minerals sparkle from time to time as can be seen in image 4. Aliens have ever rotating lights, which aim to suggest them being alive as seen in image 5. These lights turn red once an UFO follows the astronaut, while also activating a deadly ray. Finally, the astronaut features some minimal animations a shown already in image 1.
 Image 2: nova animations
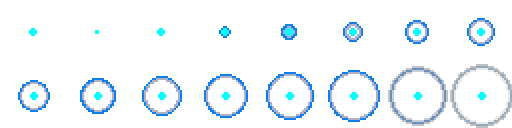 Image 3: anti-gravitational force field animations
 Image 4: mineral animations
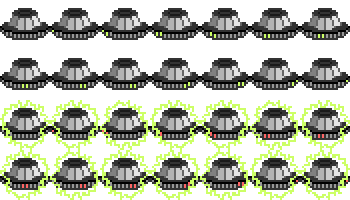 Image 5: alien animations
Animations can be used in Phaser by first loading the sprite sheet containing the animation frames in the preload function, as shown for the novae and the astronaut in listing 1. It is further defined that every frame has a width and height of 32 pixels. This and the following code extends that presented in the article about gameplay implementation, specifically collision detection.
Listing 1: loading sprite sheet containing animation frames for novae and astronaut.1...2// instead of: game.load.image('nova', 'assets/nova.png');3game.load.spritesheet('nova', 'assets/nova_animation.png', 32, 32);4// instead of: game.load.image('astronaut', 'assets/astronaut.png');5game.load.image('astronaut', 'assets/astronaut_animation.png', 20, 32);6...
Next, within the create function, the animations are defined when creating the corresponding sprite as shown in listing 2. Upon creation of the animation, the order in which frames ought to be played can be defined. In the case of the novae, the defined animation is immediately started. When starting the animation, the framerate (here: 5) and whether to loop the animation (here: true) can be specified.
Listing 2: defining and starting the animation.1...2// (randomly) place novae and add to group:3this.novae = game.add.group();4for (var i = 0; i < 3; i++) {5var nova = game.add.sprite(6game.rnd.integerInRange(100, game.world.width - 100),7game.rnd.integerInRange(100, game.world.height - 100),8'nova');9nova.anchor.setTo(0.5, 0.5);1011// define and start animation:12nova.animations.add('flicker', [0,1,2,3,2,1]);13nova.animations.play('flicker', 5, true);1415this.novae.add(nova);16};17...18// create astronaut at the center of the world:19this.astronaut = game.add.sprite(game.world.width * 0.5, game.world.height * 0.5, 'astronaut');20this.astronaut.animations.add('idle', [0]);21this.astronaut.animations.add('firing', [1]);22...
In the case of the astronaut, the animation is played when the gravity gun is fired in the update function. The code is thus placed in the if-else statement used to determine whether the gravity gun is fired as shown in listing 3.
Listing 3: playing the astronaut animation when the gravity gun is fired.1...2if(game.input.activePointer.isDown){3...4// animate astronaut:5this.astronaut.animations.play('firing', 1, false);6} else {7...8// animate astronaut:9this.astronaut.animations.play('idle', 1, false);10}11...
Overall, I learned from creating Gravity Quest's visuals that my naive ideas about pixel art were certainly wrong. Limited amounts of pixels do not necessarily reduce effort. Rather, the induced constraints make it even harder for the designer to create the desired look, focusing on relevant details, and nailing appropriate proportions.
Typography
For typography, I selected the free (also for commercial use) font silkscreen for its pixelart-esque look. Silkscreen is provided in a TrueType format, while Phaser requires bitmap fonts. To create bitmap fonts from TrueType ones, I used the free littera bitmap font generator. It outputs bitmap font spritesheets for given font files in configurable size and color. I created multiple variants of silkscreen bitmap fonts, differing in color (white or black) and size.
Visual effects
Visual effects, if correctly applied, can turn a dull game into something truly exciting. So here is a description of the visual effects used in Gravity Quest.
Particle emitters
Some of the effects depend on Phaser's particle emitters. A particle emitter, in a developer-defined way, generates multiple instances of sprites. It can be used to realize effects like rain, explosions, smoke, sparklings etc. In Gravity Quest, one particle emitter is used to indicate the usage of the gravity gun. The following code extends the one presented when discussing Gravity Quest's gameplay implementation in this serie's second article. Listing 4 shows how to load the required sprites in the preload function. The two particles are shown in image 6.
 Image 6: particles for gravity gun emitter.
 Image 6: particles for gravity gun emitter.
Listing 4: loading the particles for the gravity gun emitter.1game.load.image('gun_particle_1', 'assets/gun_particle_1.png');2game.load.image('gun_particle_2', 'assets/gun_particle_2.png');
Listing 5 shows how the gunEmitter is defined in the create function. The first two parameters specify the emitters position. The emitter is initially located at the world's origin because the position will later be constantly updated. The thrid parameter defines the maximum total number of particles in the emitter. In the next line, the previously loaded particle sprites are defined to be used by the emitter.
Listing 5: defining the particle emitter for the gravity gun in the create function.1...2this.gunEmitter = game.add.emitter(0, 0, 25);3this.gunEmitter.makeParticles(['gun_particle_1', 'gun_particle_2']);4...
Having the emitter defined, it can be used upon the astronaut firing the gravity gun as shown in listing 6. The presented code runs within the update function in the if-else statement used to determine if the gravity gun is fired. First, the emitter's position is updated to be at the edge of the closest asteroid to the astronaut (the one that is targeted by the gravity gun). Next, if the emitter is not already firing, it is started. Finally, the alpha of the emitter, and thus of all its particles, is set depending on the astronaut's distance to the closest asteroid. This way, only light sparkling can be seen if the gravity gun is fired from far away.
Listing 6: starting the emitter when the astronaut fires the gravity gun.1...2if(game.input.activePointer.isDown){3...4// emit particles:5this.gunEmitter.x = closestAsteroid.x - Math.cos(angle) * closestAsteroid.width * 0.5;6this.gunEmitter.y = closestAsteroid.y - Math.sin(angle) * closestAsteroid.width * 0.5;7if(!this.gunEmitter.on){8this.gunEmitter.start(false, 100, 15);9}10this.gunEmitter.alpha = 1 - distance / 250; // make emitter visible11...12} ...
To complete this effect, the emitter is stopped once the gravity gun is no longer fired as shown in listing 7. Again, this code is used in the update function in the if-else statement used to determine whether the gravity gun is fired or not.
Listing 7: stopping the emitter when the gravity gun is no longer fired.1...2if(game.input.activePointer.isDown){3...4} else {5...6// stop particle emitter:7this.gunEmitter.on = false;8}9...
Further particle emitters in Gravity Quest are used when the astronaut is killed by novae, thermoactive asteroids, or aliens, when aliens collide, or in the intro to create the shuttle's smoke. Overall, they are a versatile tool to bring some life to games created with Phaser.
Parallax scrolling
Another commonly used effect in 2D games is parallax scrolling. It means, that upon camera movement, the background moves with a different speed than objects in the foreground, creating an effect of depth. Phaser provides functions to implement horizontal parallax scrolling (often used in platformer style games). In gravity quest, however, the astronaut may move horizontally or vertically, so that I ended up implementing my own solution.
For it to work, first, camera movement needs to be enabled. In order to do so, the game world's bounds need to be made bigger than the actual game in the create function as shown in listing 8. (Note: this will also lead to much more dispersed asteroids and novae in the demo because they are randomly placed within the - now larger - world's bounds).
Listing 8: increasing world bounds.1...2// make the world larger than the actual canvas (for camera to be able to follow):3game.world.setBounds(0, 0, 1280, 960);4...
Next, in the create function, the game's camera is instructed to follow the astronaut as shown in listing 9. There are multiple follow modes - FOLLOW_TOPDOWN_TIGHT means that the astronaut's movements are followed closely, both horizontally and vertically, by the camera.
Listing 9: instructing the camera to follow the astronaut.1...2// make camera follow player:3game.camera.follow(this.astronaut, Phaser.Camera.FOLLOW_TOPDOWN_TIGHT);4...
For parallax scrolling to work, a background sprite needs to be loaded in the preload function and placed in the world as a tilesprite in the create function as shown in listing 10. In a tile sprite, the defined sprite is horizontally and vertically repeated.
Listing 10: load background and place it.1...2// load background sprite in the preload function:3game.load.image('background', 'assets/background.png');4...5// place background in the create function:6this.background = game.add.tileSprite(0, 0, game.world.width, game.world.height, 'background');7...
To implement parallax scrolling, first, in the create function the position of the camera is stored as shown in listing 11. It is denoted as cameraLastX and cameraLastY because this last position will used in the following update loop to implement parallax scrolling.
Listing 11: store camera position in the create function.1...2// store cameras position:3this.cameraLastX = this.camera.x;4this.cameraLastY = this.camera.y;5...
Now, in the update circle, the camera's current position can be compared to the last stored one as shown in listing 12. If the position is changed, the background is shifted and the new position is stored.
Listing 12: compare current camera position to last stored one and eventually shift background.1...2// compare current camera position with last one and shift background if it differs:3if(game.camera.x !== this.cameraLastX){4this.background.x -= 0.2 * (this.cameraLastX - game.camera.x);5this.cameraLastX = game.camera.x;6}7if(game.camera.y !== this.cameraLastY){8this.background.y -= 0.2 * (this.cameraLastY - game.camera.y);9this.cameraLastY = game.camera.y;10}11...
Sound
For sound, I mostly depended on quality sources that I collected over the months working on Gravity Quest. Here are my resources:
- UniversalSoundFX is a library of over 3000 sounds that can be used royalty free in (commercial) projects / games. I got to know about it because Richard Davey (creator of Phaser) once tweeted about it. I find the 20$ a good investment, considering the broad range of sounds that fit various games.
- Sfrx and the thereupon based Bfrx are tools that randomly create sounds of a certain style and allow you to fine tune them with regard to various properties. I did not manage to master these tools, but 2 of the random sounds they generated made it into the final game (try to guess which...).
- CC mixter is a repository of music under the creative commons license. The site allows to search for songs regarding title or creator and what clearly states what is required to correctly use the songs (commercially). Gravity quest features 'C95 - Routine Maintenance Mission' by Javolenus featuring Nickleus for the game's menu and 'Space Intro' by Karsten Holy Moly for the intro - both songs are listed in the ending scores.
- Nosoapradio is the repository of music by Deceased Superior Technician (DST). The songs can be used in (commercial) games and the website has a very nice filtering interface to select suited songs. Gravity quest features 'ALightIntro' in the outro, and the song is listed in the ending score.
There are certainly much more good sources of (free) audio files to use in games. If you have some at hand, drop them in the comments section below.
Demo
Press the button below to play a demo where some animations, particle emitters, and parallax scrolling are implemented as described above.
Conclusion
Creating great visuals and sound for a game is similarly important as it is hard to do. Creating Gravity Quest's visuals and sound, despite them being far from perfect, by approximation took me more time than coding the game's logic. I hope this article provides some interesting resources for you to get started. The complete, commented source code of the demo linked in this article, featuring some of the final game's effects, is as usually available at GitHub. In the following article, I will talk about creating Gravity Quest's levels with a participatory approach.
Resources linked in this article
- Gravity Quest at Apple's App store
- Gravity Quest's website
- Pixel art games aren't retro, they're the future - recent article about pixel art in computer games
- What is Pixel Art? - article explaining the fundamentals of pixel art
- Pixen app - pixel art tool for Mac OS
- Pixen app GitHub repository
- Silkscreen - pixel font, free for personal and commercial use
- Littera - free bitmap font generator
- UniversalSoundFX - collection of over 3000 sounds for video games
- Sfrx - tool to (randomly) create game sounds
- Bfrx - tool elaborating sfrx
- CC mixter - collection of music under the creative commons license
- 'C95 - Routine Maintenance Mission' by Javolenus featuring Nickleus - song used in the menu
- 'Space Intro' by Karsten Holy Moly - song used in the intro
- Nosoapradio - collection of music by Deceased Superior Technician (DST)
- GitHub repository - complete, commented code of the demo